Documentation
pascom Cloud Phone System Documentation and Release Notes
pascom App Userguide
The detailed user manual of the pascom app helps you to get started easily in the world of pascom. Here you will learn everything worth knowing for your everyday work with pascom

The first steps with pascom
Not sure how to get started with pascom? Get off to a flying start with our Quick Start Guide, where you will learn everything you need to know.

pascom ONE Trunk for your telephony
Enjoy all the benefits of the pascom All-In-One Cloud communication platform with the integrated pascom SIP Trunk. Learn everything you need to know.
Data protection and IT operations in the pascom cloud
Here you will find frequently asked questions and answers about data protection and IT operations in the pascom cloud, so that you are well informed about what happens to your company data.
Limits and Data Retention in the pascom.cloud
A lot of data accumulates daily on a productive cloud telephone system, which can quickly grow to an unmanageable size. Here you will find an overview of limits for storing your data.
In the userguide for the mypascom portal you will find a lot of useful information about managing your subscriptions.
Learn how the user concept of the pascom telephone system works and how users are managed.
pascom is compatible and interoperable with a wide range of endpoints. This guide explains how you can securely integrate hardware devices.
How to control incoming calls and distribute them to your users via queues or even IVR menus.

Updated: Confirm call acceptance via DTMF
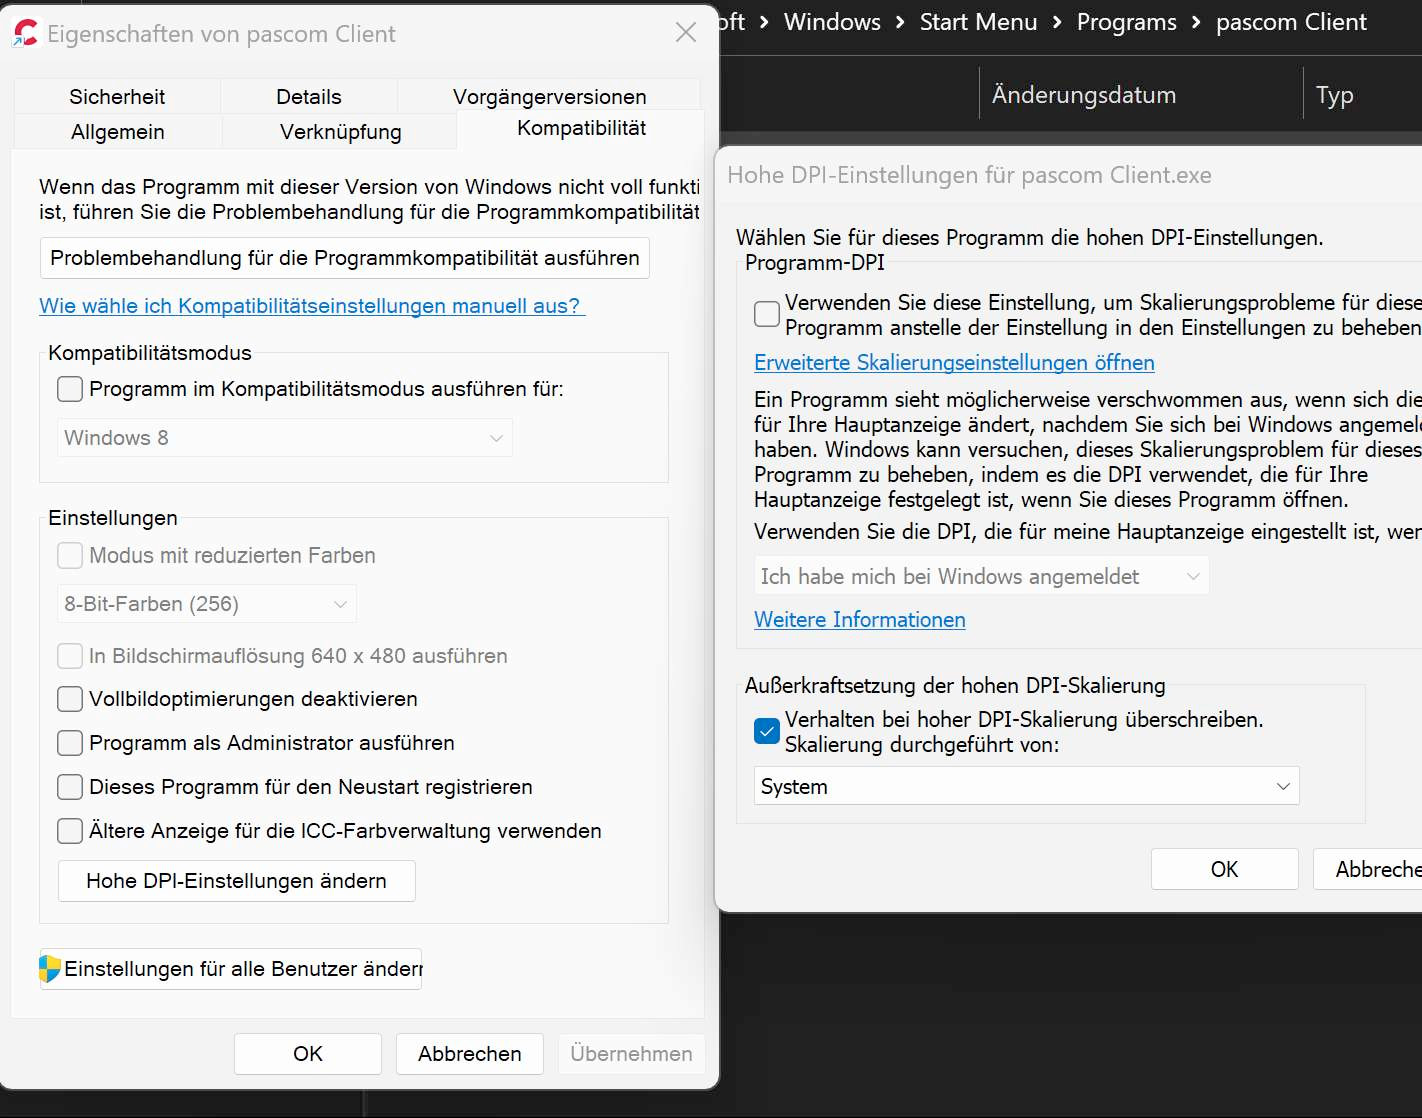
New: HowTo for incorrect scaling of the pascom client
Update: AI Text-To-Speech for Prompts
Updated: Various login methods explained

pascom’s Glossary of VoIP Terms
Confused by all the tech jargon and fancy industry terms? Use our VoIP Glossary and learn what’s what. So that you are well informed for telephony with pascom
Didn't find an answer to your question?
Ask our support forum. We are here to help!
Ask Our Support Forum