The ISDN VoIP Migration
Guide to Migrating from the ISDN to a Business VoIP Phone System
As with all technologies, eventually the old will become antiquated as the new generation takes hold. Such a dynamic is currently sweeping across the telecommunications industry as Carriers begin the shutdown cycle of their ISDN networks in favour of SIP and All-IP connectivity. For many companies, the move away from the ISDN has proved to be a challenge, particularly those with larger telephone system installations. Setting up a VoIP solution from scratch is completely new territory. The purpose of this guide is to provide a step by step introduction to the ISDN All-IP migration process.
1. VoIP Readiness Test
When migrating from a legacy ISDN PBX to a new VoIP phone system, it is not always necessary to deploy completely new hardware. Some devices can be retained and used via an adapter (ATA). It is also possible that you already have a range of VoIP enabled hardware at your disposal, as many newer endpoints support both ISDN and VoIP technologies.
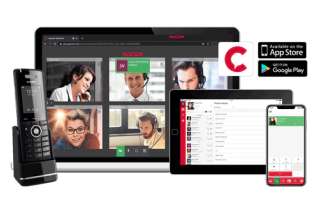
As you are also moving from a specific environment (ISDN) to an IP or Internet-based service (VoIP), it is in fact likely that a significant proportion of your hardware landscape can be repurposed for IP telephony, such as your Internet Router / Firewall, your desktop computers and laptops plus any headsets. Everything else that could be required is included in the phone system software. That is to say that after installing a pascom phone system, all the required software applications are included per default. Even a SIP softphone for desktop and mobile clients is included, which can be used for CTI and mobile collaboration purposes. Although it is, of course, an option to deploy VoIP enabled hardware should you wish, the only real requirement is a decent headset for your PC and thanks to the softphone, you and your team will be able to start making and receiving calls almost immediately.
Situational Analysis: Migrating From an ISDN to a VoIP Phone System
Due to the previously mentioned conditions, it is advisable to conduct a situation analysis of your current setup before migrating away from your ISDN phone system. You should consider, among others, the following:
- Number of existing telephony connections / available telephony endpoints.
- Type and volume of non-telephony endpoints (fax, door/lift intercom systems, alarm systems, card terminals, franking machines etc., which are connected to the ISDN phone system).
- If necessary, consider the requirements of remote workers, both field sales and home office employees, as they can be directly integrated into your VoIP phone system.
- Any immediately available and usable VoIP enabled hardware.
- ISDN Hardware, which can be incorporated via an ATA adapter.
- Check fax machines for T.38 protocol support (support for real-time communication).
- Existing router capabilities in terms of incorporated firewall support.
- For which employees, for which the new VoIP software applications should be made available.
- Suitable VoIP providers, who also enable calls to external landlines i.e. the PSTN.
2. Create a VoIP Migration Concept
Before switching from an ISDN PBX to a business VoIP phone system, you should first create a proof of concept in order to ensure the smoothest possible transition. Simply follow these essential steps:
- Identify which phone system deployment option best suits your needs: On-premise appliance or virtualised or in the cloud.
- Determine which hardware components can be repurposed for future use and which, if any, must be newly acquired i.e. server hardware (pascom Appliance) and Gateways.
- Conceptualise your employee endpoint assignments
- Source any missing hardware (Server, IP phones or headsets etc)
- The initial setup can and should be done before the go-live of the VoIP phone system
- Use our full featured free starter pack: cloud phone system or download the pascom phone system ISO file.
- Thorough function tests of the configured system.
- Phone number porting.
Step by Step VoIP Phone System Installation
Depending on the type of phone system you have decided upon, the initial steps will differ. Should you have decided on a self-hosted solution, i.e. install on your hardware or as a virtualized IP PBX (VoIP phone system), you will first need to download the phone system software, normally in the form of an ISO file. If you are going the hardware route, you can save yourself the hassle by choosing a vendor who also offers a range of appliance solutions, which can be delivered pre-configured according to your requirements. When deploying such a phone system, be sure to follow the setup guidelines provided by the vendor. Alternatively, choose a cloud phone system, and get started within minutes, saving yourself yet more time and hassle by eliminating hardware configuration.
Business Phone System Initial Setup: Add Users
Once the VoIP solution is up and running, the next step is to start adding the users who should use the new platform. This step is particularly straightforward and can be completed in minutes if you able to import your user accounts via Active Directory, LDAP or similar. Should such an option not be available, the import from excel file option is an excellent alternative to manually adding users, which due to the administrative hassle for larger deployments, is not recommended.
Register VoIP Enabled Hardware
After on-boarding your users, it is now necessary to register any IP endpoints (VoIP hardware). Depending on the endpoint vendor and where the devices are located, it is often possible to automatically detect and configure endpoints using a process known as Auto provisioning. All you need to do is connect the device to your LAN network and power supply (if Power over Ethernet (PoE) is not supported) and the VoIP phone system will do the rest. Should the phone system vendor not support Auto-provisioning for your VoIP enabled endpoints, it is often possible to add the devices manually – simply follow the phone system provider setup guide.
Assign VoIP Endpoints to Employees
Once all the endpoints have been registered correctly, they can be assigned to the phone system users, which you added in step 1 of this configuration guide. This is where your pre-planning will come into play, as you will now be able to assign devices according to your plan from phase 2 (VoIP migration concept).
VoIP Phone System Desktop and Mobile Client Installation
Best in breed professional business VoIP phone systems such as a pascom solution come complete with all necessary software applications as standard. In order to start using the full scope of employee communication and collaboration tools, it is first necessary to download and install the corresponding VoIP phone system desktop and mobile applications. To do this simply follow the vendor instructions and in the case of a pascom solution, download the appropriate desktop application (Windows, Mac, Linux, Android or iOS) from our website. Thanks to the pascom e-mail server incorporated with pascom 18 solutions or newer, it is now even possible to simply invite users via e-mail and let them use our setup wizards to guide them through the client setup process.
Switchboard Setup
It is now time to set up your switchboard – or front desk, reception etc. No matter what you call it, this is an important step as the switchboard is often the first point of contact in your phone system. Within the switchboard team itself, it is advisable to deploy desktop IP phones in combination with the desktop application as this covers every possible scenario. Just as with your ISDN phone system, it is possible to create a more professional impression by using Music on Hold, custom greetings/prompts, Auto Attendants, Options Menus (IVR) and many additional features on your desire switchboard extension. Should you have already had experience with ISDN systems, VoIP phone systems or telecommunications in general, the available switchboard options will likely already be known to you.
Test the VoIP Phone System Setup
In order to avoid unwanted workflow breakdowns and unnecessary downtime, it is highly recommended to perform thorough tests of your initial setup before you take your old ISDN phone system offline. As your VoIP endpoints communicate over different lines to your ISDN phone system, conducting such independent tests should only have little impact of the day to day workflow, but can support you identify any issues before they become a problem.
Phone Number Porting
As soon as you have ported your phone number, your old ISDN phone system can be consigned to the scrap heap, but please consider the environment and recycle responsibly. Now you will need to map your Direct Inward Dial (DID) numbers from your number block (if applicable) to your employees and/or teams and setup your call routing in order to ensure calls are automatically and professionally routed to appropriate contact or queue, plus configure how calls should be handled should an employee not be reachable at the time of the call.
Once complete, such measures, as well as measures like adding new users, removing older entries or modifying the device and user assignments, are practically the only on-going administrative tasks relating to the configuration of your VoIP phone system.
3. Employee Information and Training
An essential but often overlooked element of migrating phone systems is to keep your employees informed and up-to-date. So either after or, better yet, during the VoIP phone system installation and commissioning process, make time to introduce the new VoIP solution to your employees and always consider their requirements, particularly any special information requirements of any employee who will be responsible for any element of the on-going management and / or maintenance of the solution.
Give the pascom team a call on +49 991 29691 0 to discuss your requirements and get started within minutes using our free hosted business VoIP phone system edition!